Getting started with Perk on OS X
Perk is glue that holds together a collection of powerful and full featured libraries that are written by some awesome developers. This guide will help you get started on OS X.
For the purposes of this guide we'll assume that you already have the following software installed:
- Node (version 5.0+)
How can I tell if node is installed? Type
node -vinto your terminal. It should respond with the version of node that you have installed. If it's not installed you can follow our guide to install node on your mac. - redis
How can I tell if redis is installed? Type
redis-cli -vinto your terminal. It should respond with the version of redis that you have installed. If it's not installed you can follow our guide to install redis on your mac. - PostgreSQL
How can I tell if postgres is installed? Type
psql -Vinto your terminal. It should respond with the version of postgres that you have installed. If it's not installed you can follow our guide to install postgres on your mac.
Installing Perk
In your terminal type the following commands:
npm install -g knex perk-cliInstalls knex and the Perk command line interface
perk myProjectcreates a new Perk project called "myProject"
cd myProject && npm installinstalls all of the dependencies for your new project
Starting Your App
In your terminal type npm run dev. This will start the perk server and restart the server if any changes are detected to your code.
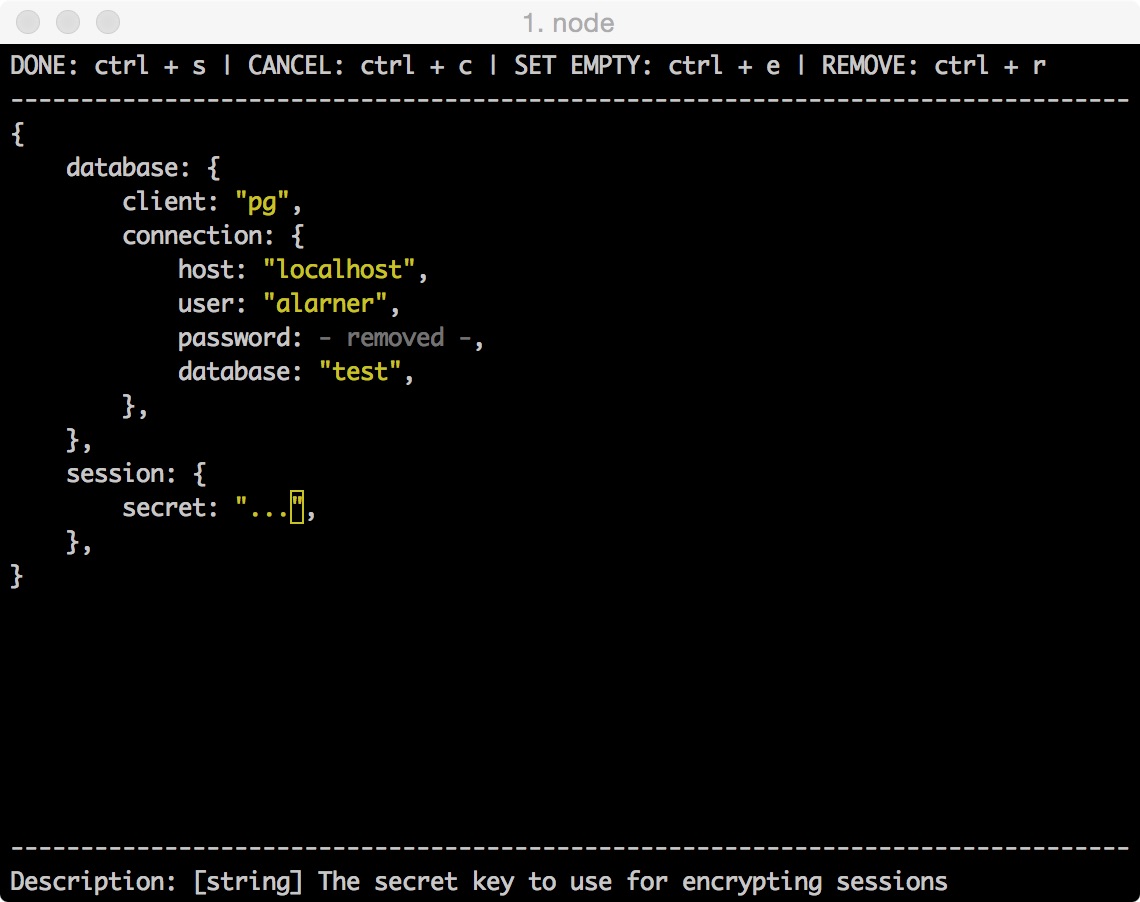
Perk has a robust configuration system that allows you to specify default config information, environment specific overrides as well as local machine specific overrides. This is useful for configuring database connection information, OAuth API keys, session information and more. The first time you start a Perk app it will ask you to specify some information about your app.
The bare minimum information that you will need to fill out when your app first starts is the database connection info as well as a secret key to encrypt your sessions. If you're not creating a database driven application you can skip the database information.
- database.client: The database adapter that we want to use. In our case we're using PostgreSQL so that value should be
pg. You can find a list of possible database adapters here. - database.connection.host: The url or IP if the server where your database is hosted. We will use a local database so enter
localhost. - database.connection.user: The postgres user that you want to connect with. You can create a new user using the command
createuser myNewUser. If you installed postgres with homebrew a user should have been created for you that is the same as your computers user (you can typewhoamiin the terminal to find this user). - database.connection.password: The users password. You can leave this blank or type
ctrl+rto remove it from your configuration file. If you specified a password for your postgres user then you can type it in here. - database.connection.database: The database that you want your app to connect to. You can create a new database by typing the command
createdb myNewDBin the terminal). - session.secret: A secret string used to sign the session cookie to prevent tampering.
If you are not building a database driven app then you can leave the database connection information blank.
You can learn about all the different configuration options in the configuration documentation. If you ever need to change these configuration values at any point, you can change them in the config/local.js file.
Use the arrow keys / enter key to navigate the configuration interface. Once you are done type crtl + s to save and continue.

After saving your app should be up and running! Go to http://localhost:3000 to check it out.
What's next?
There are a bunch of other great guides on topics like: