User authentication with Facebook
Building your own Facebook login with Perk is super easy. It's a four step process:
- Get the necessary API keys from Facebook (or whichever other supported third party service you want).
- Update your
config/auth.jsfile orconfig/local.jsfile. - Create a login button.
- Deploy to Production
1. Get API Keys
- Log in to Facebook.
- Go to the Facebook for Developers.
Click Add a New App.
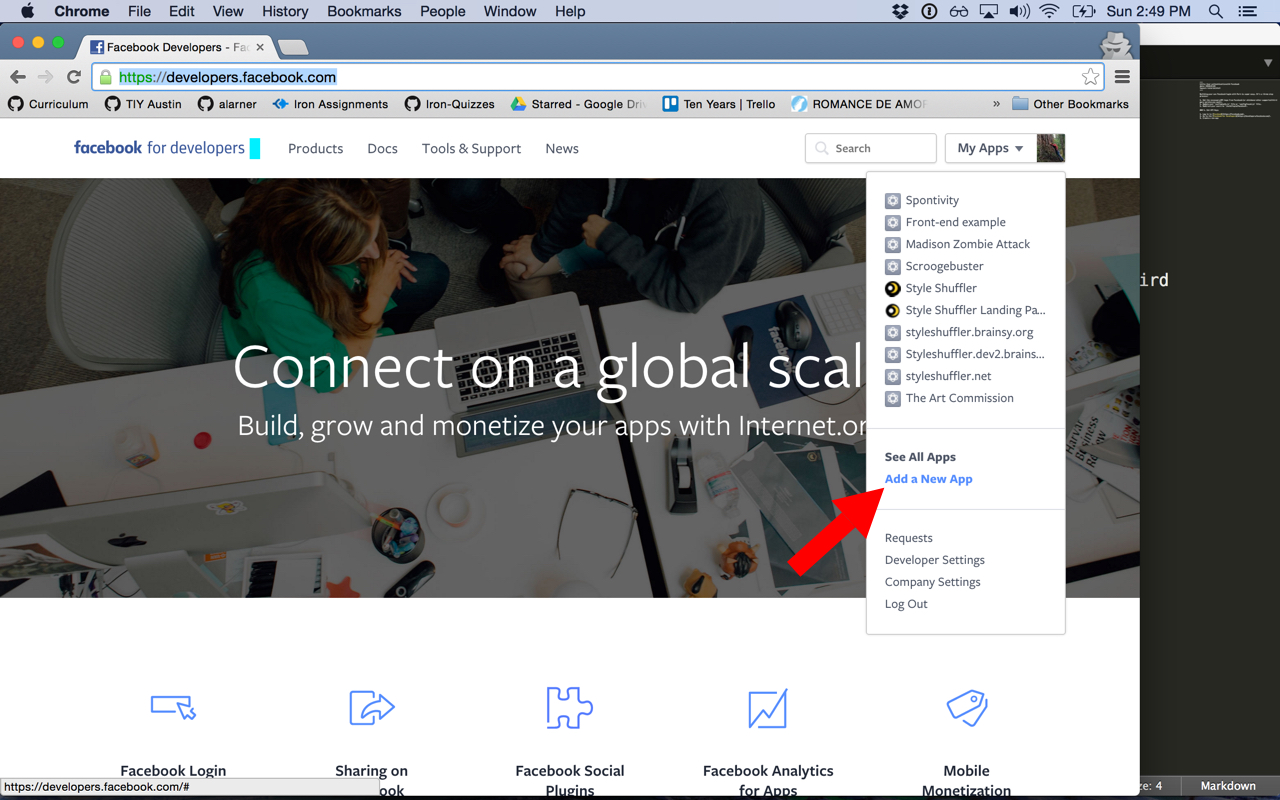
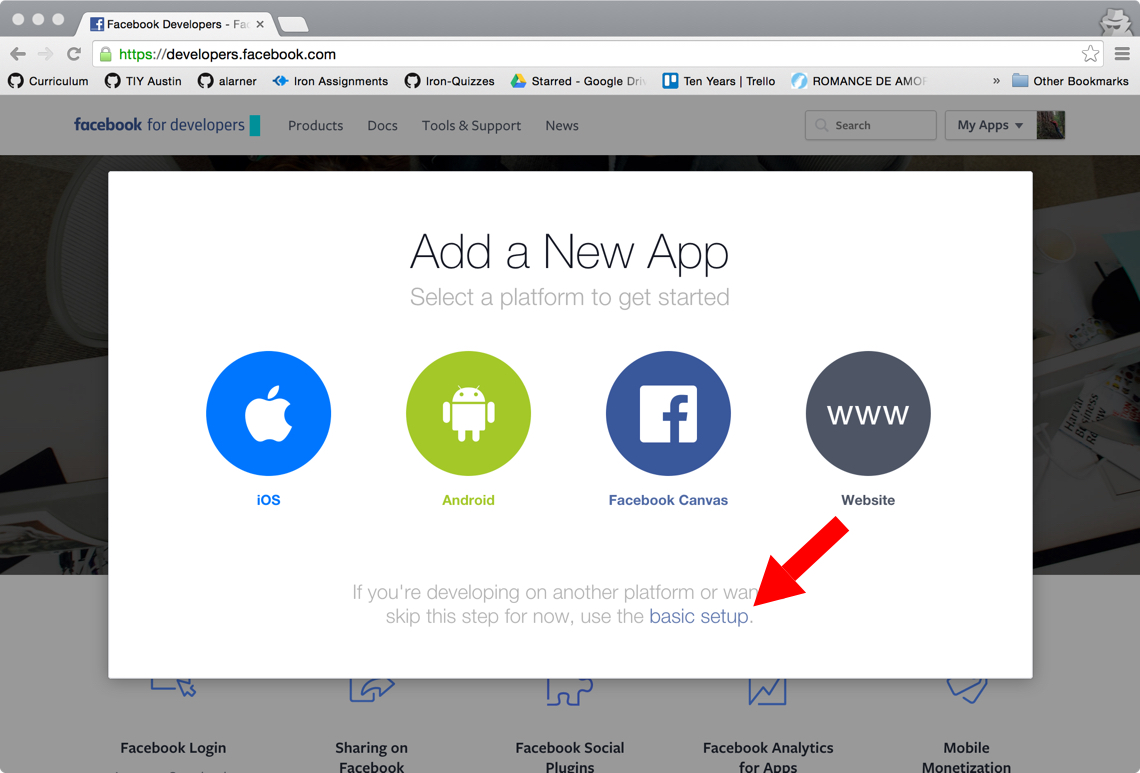
Click on the small link that says "Basic Setup."
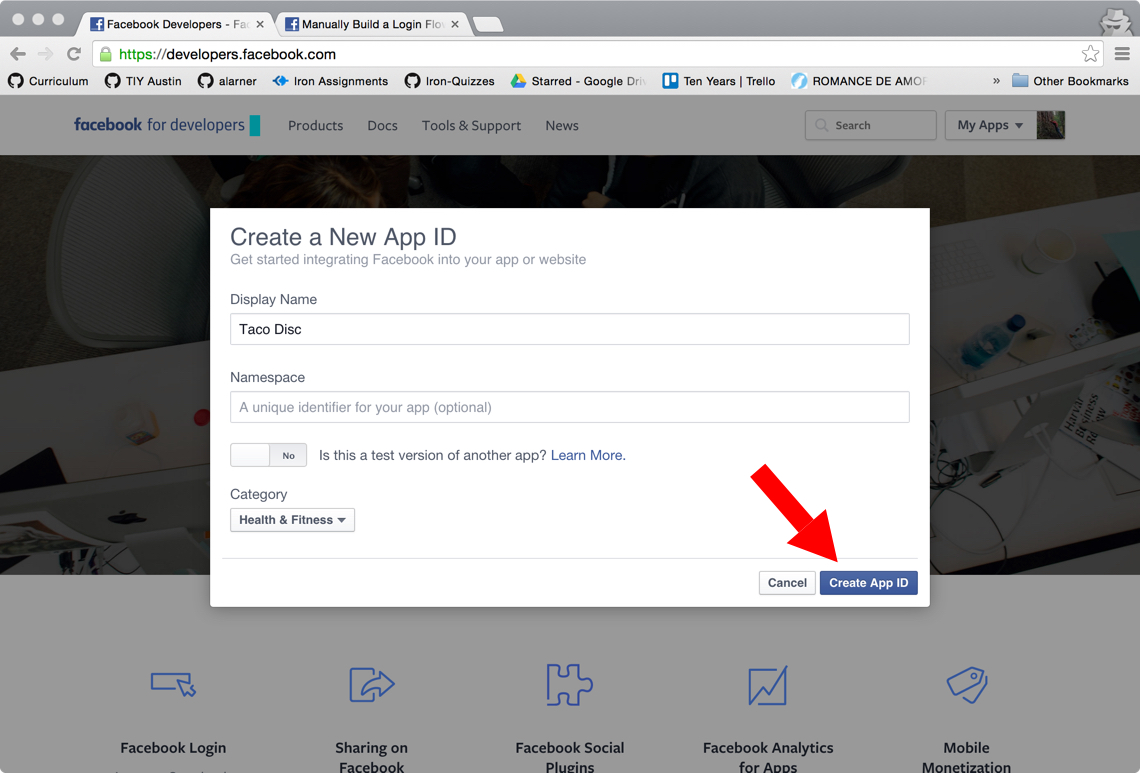
Fill out a Display Name and Category for your app. The rest can be left unchanged. Then click the "Create App ID" button.
Click on the Settings link on the left and then fill in your app domain (probably localhost for your dev environment) and site url. Click Save Changes.

Stay on this page, we are going to use the App Id and App Secret.
2. Update your config/auth.js
Open up your config/auth.js file in a text editor. In the section that looks like this:
facebook: {
    clientID: '{{ Facebook OAuth2 Client ID }}',
    clientSecret: '{{ Facebook OAuth2 Client Secret }}',
    // https://developers.facebook.com/docs/facebook-login/permissions
    scope: [
        // 'email'
    ],
    requireEmail: true
},
- Replace
{{ Facebook OAuth2 Client ID }}with the App Id that you just created. - Replace
{{ Facebook OAuth2 Client Secret }}with the App Secret that you just created. - Specify any permissions that you want to request from your users and put then in the
scopesection. A full list of possible permissions for Facebook can be found here.
3. Create a login button
The last step is to create the actual login button. You can do this in any of your views. The only important part is that you redirect to /auth/facebook/login. For example:
<a href="/auth/facebook/login">Log in with Facebook</a>
Click on that button! You should be redirected to Facebook and asked to authorize the app.
4. Deploy to Production
Before you launch you app, you'll need to set up a few more configuration settings on the Facebook side. Go to developers.facebook.com and select your app.
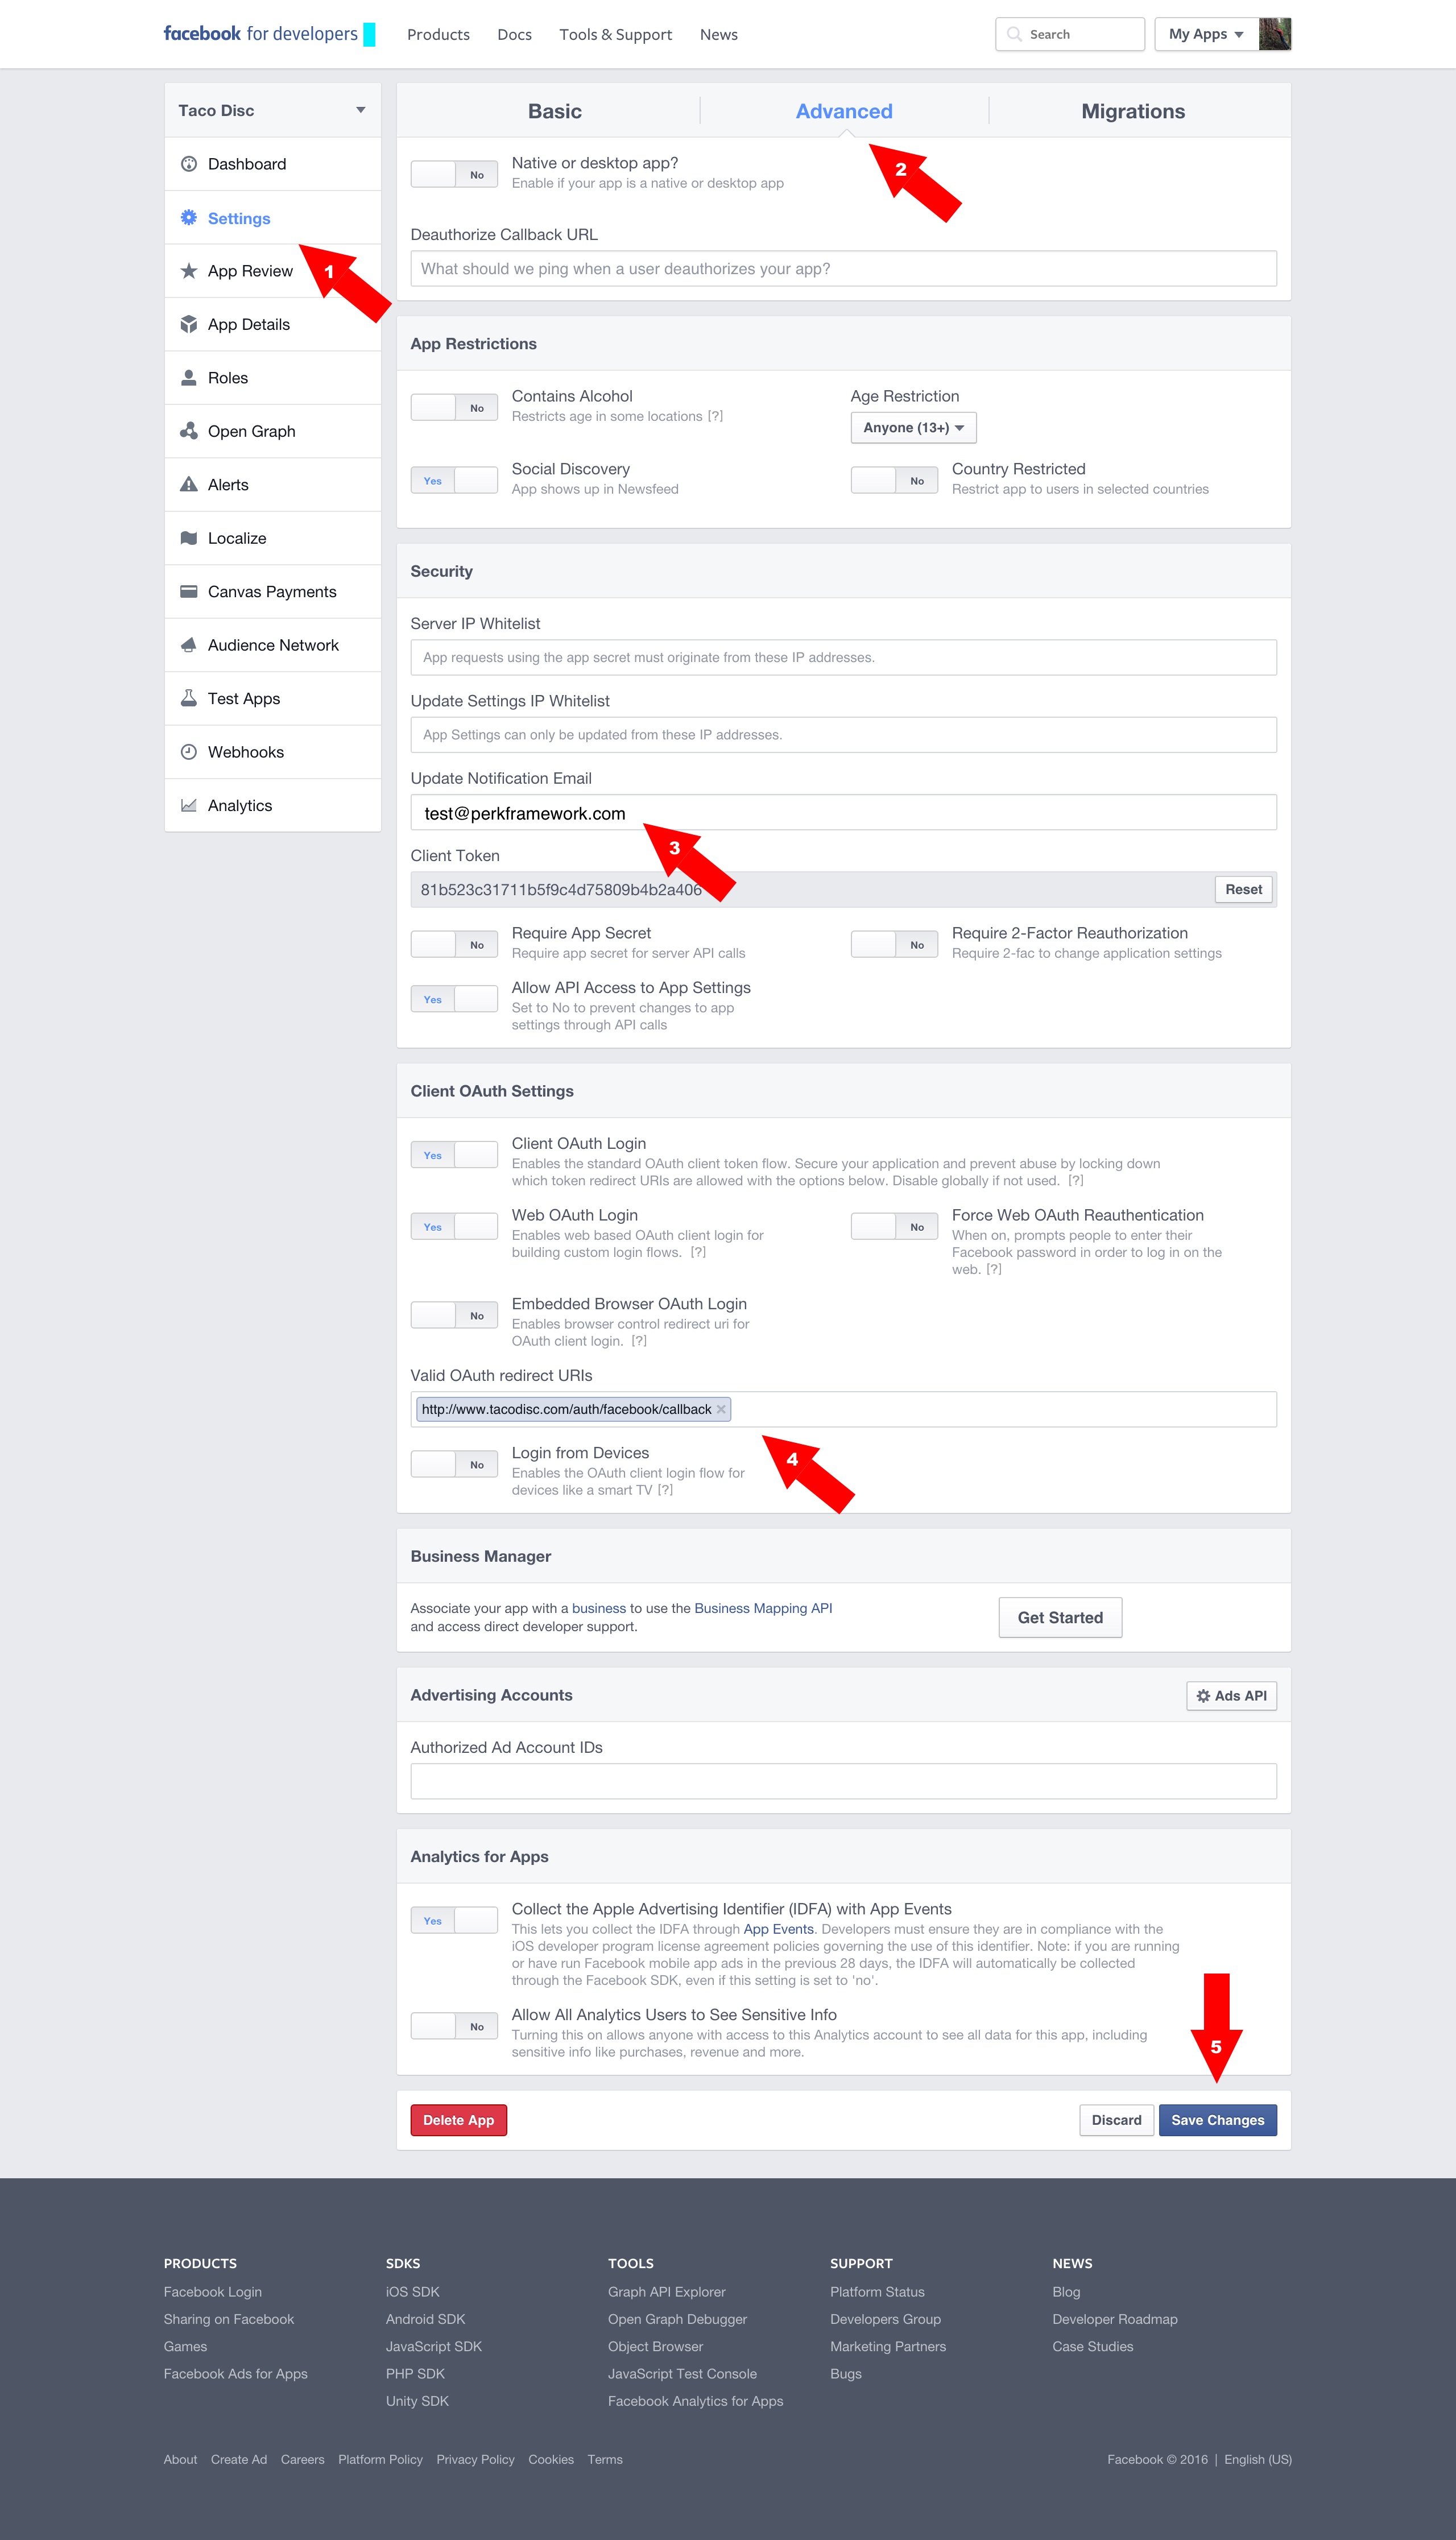
- Click on Settings on the left
- Select the Advanced tab at the top
- Specify an Update Notification Email
- Specify Valid OAuth redirect URIs
- This will be something like yourdomain.com/auth/facebook/callback
- Click Save Changes at the bottom of the page.
Finally click on the App Review tab and toggle on the button next to the text Do you want to make this app and all its live features available to the general public?